How to Wrap Porch Posts: DIY Steps and Styling Ideas

In my years of experience helping homeowners refresh their curb appeal, I have found that porch posts are one of the most overlooked features of a home’s exterior.
They are the first thing guests brush past on their way to your door, yet they are so often left plain, chipped, or completely bare.
The good news is that wrapping your porch posts is a surprisingly simple project that can transform your entryway from forgettable to genuinely stunning.
Below, I am walking through exactly how to do it step by step, followed by my favorite ways to style your newly wrapped posts.
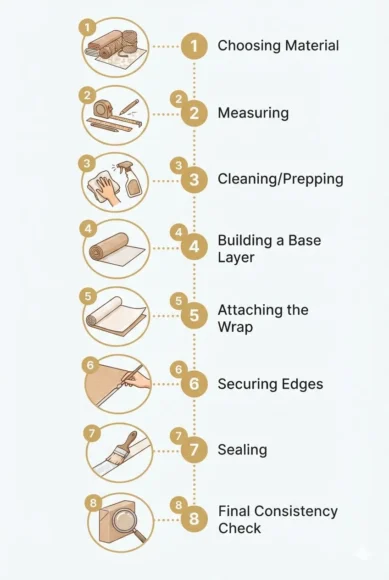
Step 1: Choose The Right Wrapping Material For Your Style
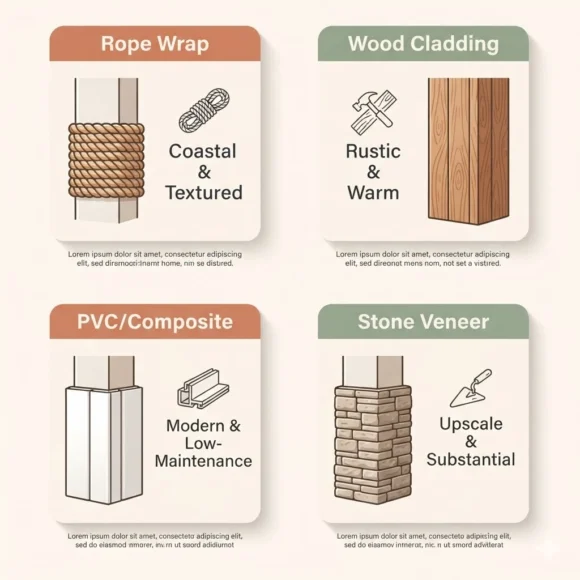
Nautical rope brings coastal charm, wood cladding adds rustic warmth, PVC or composite wraps offer a low-maintenance modern look, and stone veneer creates an upscale, substantial feel.
Hold a sample of whatever material you are considering against your actual siding and trim before committing, since colors and textures read differently under natural light than they do indoors at a hardware store.
Step 2: Measure The Circumference And Height Of Each Post
Wrap a flexible tape measure around each post to get the circumference, then measure the full height from base to where the post meets the porch ceiling.
Since posts can vary slightly even on the same porch, measure each one individually rather than assuming they match, and write each number down before moving to the next post.
💡 Quick Tip
Label each measurement with its post location right away, since it is easy to mix up numbers once you have measured three or four posts.
Step 3: Clean And Prep The Post Surface
Wipe down the post to remove dust, cobwebs, and any loose or peeling paint before you attach anything to it.
If the post has rough or splintered areas, a light sanding will help your wrap material adhere or sit more smoothly, especially for wraps that rely on adhesive rather than nails.
Dust, cobwebs, and rough patches under the wrap.
A smooth surface the wrap material can actually grip.
Step 4: Build A Base Layer If Needed
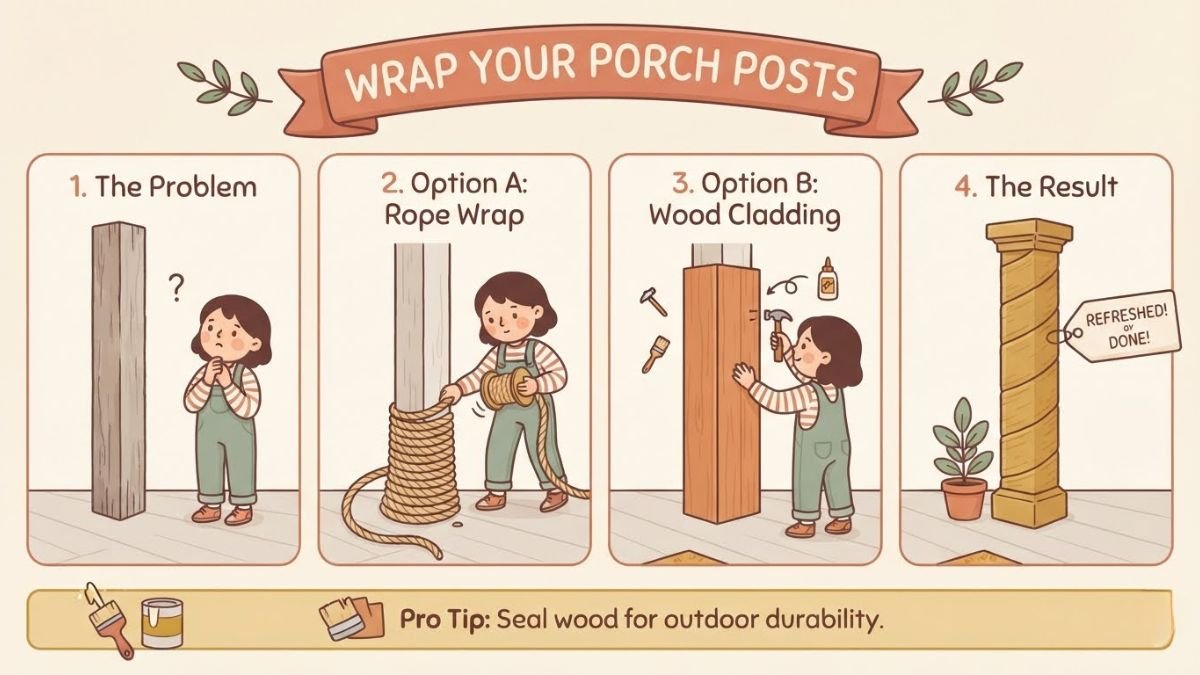
For wraps like stone veneer or thicker wood cladding, attach thin furring strips or a plywood base layer first to create an even surface and airflow gap behind the material.
This step is not necessary for lighter wraps like rope or fabric, which can typically go directly against the post.
Do you need a base layer?
Step 5: Attach Your Chosen Wrap Material
Starting at the base of the post, begin securing your material according to its type, wrapping rope tightly and consistently upward, or fastening wood and composite panels with finishing nails or adhesive.
Work slowly and check level often to keep everything tight against the post, since a small lean at the base becomes much more visible by the time you reach the top.
Step 6: Secure The Top And Bottom Edges
The ends of your wrap are the most likely spots to loosen over time, since they take the most contact and weather exposure of any part of the post.
Reinforce them with extra adhesive, finishing nails, or a decorative trim band. A clean edge here makes the entire post look intentional and finished rather than mid-project.
Add extra adhesive or nails at both ends first.
Add a decorative trim band to cover the seam.
Check both ends again once fully dry or set.
Step 7: Seal Or Weatherproof The Finished Wrap
An exterior sealant, weatherproof varnish, or water-resistant spray protects your finished wrap against rain, sun, and temperature changes, and this single step significantly extends how long the whole project lasts.
Match the product to your material specifically, since a sealant made for wood behaves differently on rope or composite.
Match the sealant type to your wrap material.
Apply an even coat and let it fully cure.
Using a generic sealant not rated for your material.
Skipping this step to save time.
Step 8: Repeat And Check For Consistency
Once your first post is complete, use it as your reference for the rest so that every post on your porch matches in height, tightness, and finish.
Step back periodically to view them together from a distance, since small inconsistencies that are invisible up close often become obvious from across the yard.
| Check | Why It Matters |
|---|---|
| Height and tightness | Mismatched posts are obvious from the street. |
| Viewed from a distance | Reveals inconsistencies invisible up close. |
Style It With Hanging Lanterns Or Sconces
A small hanging lantern or wall sconce mounted near the top of a wrapped post adds warmth and function once the base project is finished.
Choose a finish, like matte black or aged brass, that complements your wrap material rather than fighting against it for attention.
Match the lantern finish to your wrap material rather than picking it separately.
Add Trailing Greenery Or Potted Plants
A hanging planter or a potted plant placed at the base of a wrapped post softens the look and adds natural texture that pairs well with almost any wrap material.
Trailing ivy or ferns work beautifully against both wood and rope wraps specifically, since the vine texture echoes the wrap’s own layered surface.
- ▸A hanging planter near the top, or a potted plant at the base.
- ▸Trailing ivy or ferns pair especially well.
- ▸Works with both wood and rope wraps.
Wrap In Seasonal Accents For A Festive Touch
Your wrapped posts become an even better canvas for seasonal decor, like a simple garland at Christmas or a light ribbon wrap in fall colors, once the neutral, textured base wrap is already in place.
Seasonal add-ons layer on beautifully without needing to compete with anything permanent underneath.
Install House Numbers Or A Small Sign
Mount a small house number plaque or a welcome sign directly onto a wrapped post, adding both function and personality to your entry.
Choose a finish that contrasts slightly with the wrap for visibility, brass against stone veneer or black against natural wood both read clearly from the street.
📌 Good To Know
A slight contrast between the plaque finish and the wrap material keeps house numbers legible from the street.
Add String Lights For Evening Charm
A single strand of warm string lights wound around the top of your posts, just above the main wrap material, creates a soft glow that highlights the texture underneath at night.

Keep the wind loose rather than tight, since a relaxed wrap catches shadow and light more interestingly than a perfectly even spiral.
Even but flat, with little shadow or texture.
Catches light and shadow more interestingly at night.
Common Mistakes To Avoid When Wrapping Porch Posts
A few mistakes show up again and again on porch post wrapping projects, and all of them are avoidable with a little extra care at the right step.
Pull wraps taut and check tightness as you work.
Test your material sample against your home first.
Wrapping loosely or skipping the sealant step.
Wrapping one post without checking it against the others.
Choosing Between DIY And Hiring A Professional
Lightweight wraps like rope or fabric are very beginner-friendly and can usually be completed in an afternoon with basic tools.
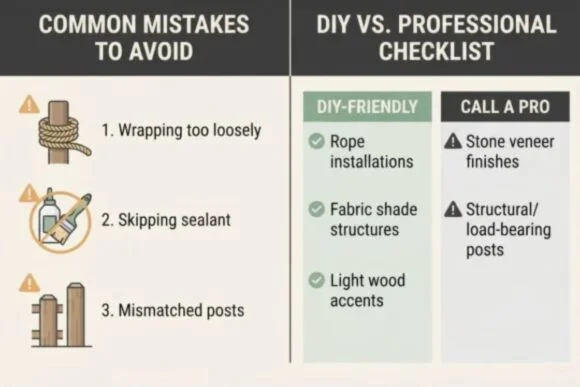
Heavier materials like stone veneer or custom wood cladding involve more precise cutting and structural attachment, so if your posts are load-bearing or you are working with a heavier material, it may be worth consulting a contractor to ensure everything is secured safely.
| Material | Best Approach |
|---|---|
| Rope or fabric | Beginner-friendly, an afternoon DIY project. |
| Stone veneer or custom wood cladding | Consider a contractor for load-bearing posts. |
Final Thoughts
Wrapping your porch posts is one of those small projects that makes an outsized difference in how your entire home feels from the moment someone walks up. It takes patience, careful measuring, and a steady hand, but the result is a warmer, more intentional entryway that sets the tone for your whole house.
Take it one post at a time, keep your material taut and even, and once the wraps are finished, have fun layering in the lighting and greenery that make the space feel truly yours.
Frequently Asked Questions
What is the best material to wrap porch posts with?
It depends on your style and climate. Rope works beautifully for a coastal or nautical look, wood cladding suits rustic and farmhouse homes, and composite or stone veneer wraps offer a more upscale, low-maintenance finish for busier entryways.
How long does a rope-wrapped porch post last?
With a quality outdoor-rated rope and proper sealant, a rope wrap can last several years before needing to be redone, though covered porches that are protected from direct sun and rain will typically last longer.
Can I wrap porch posts myself without hiring a contractor?
Yes, lighter wraps like rope, fabric, or thin wood cladding are very doable as a DIY project. Heavier materials like stone veneer may require more precise fitting and are sometimes easier with an extra set of hands or professional help.
Do porch post wraps need to be replaced every year?
Not necessarily. A well-sealed and properly installed wrap can last multiple seasons, though it is worth inspecting it each year for loosening, moisture damage, or fading, especially if your porch is exposed to direct weather.